First Certificate
Once the account is ready, it is time to move on to issuing the first certificate.
Use the staging account first to work out any issues or errors prior to trying this with your production account.
Create A Private Key
This step can be skipped when intending to generate a new key. Generating a new key is an option presented when creating a new certificate.
If you want to import an existing key, navigate to Private Keys,
click New Key, and import the key before proceeding.
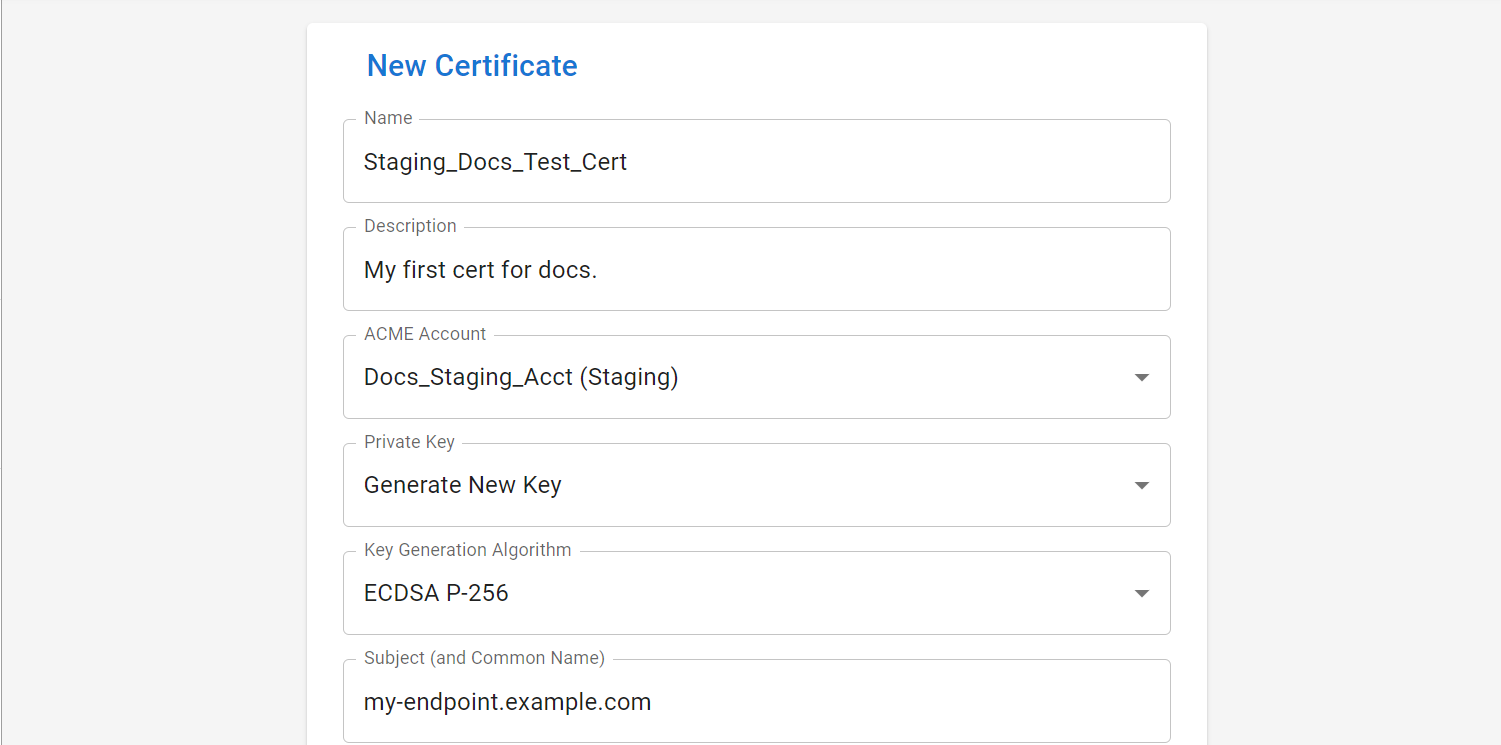
Create A New Certificate
Navigate to Certificates and click New Certificate. Populate the
form with the desired details.
Once submitted, you'll be redirected to the new certificate. Click the
Place New Order button (at the bottom) to send a request to the ACME
Server to issue a new certificate.
A new order will appear under ACME Orders. Wait for its Status to
change to Valid or Invalid. While waiting, you can check the status
by navigating to Order Queue or Logs.
If the Order moves to Valid, everything worked properly. If it moved
to Invalid review the logs to determine the reason why. The most
likely cause is an improperly configured Provider (Challenge Solver).
Make changes as appropriate and click Place New Order and wait for
the result. Repeat this process until the Order result is Valid.

Once things are working, repeat this process with the production account for all of the certificates you want. Use this same process for future certificates.
After an Order becomes Valid, Cert Warden will automatically place future orders ~40 days before expiration to keep the certificate fresh.
The first production certificate you should issue should be for your
Cert Warden server to secure it. If you did not edit config.yaml Cert Warden will
run in https mode using the certificate name serverdefault so use that
as the name of this production certificate.
Once the certificate's order is Valid, navigate to Settings and
click Restart and your server will reload with https using the
specified https port in the config file (port 4055 if not specified).